It’s My Birthday: Maximizing Your Digital Cut Files for Professional Results
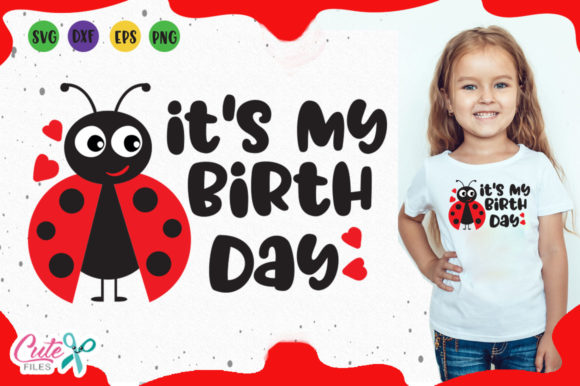
Celebrating a personal milestone requires design assets that are as versatile as they are festive. When you download a digital package titled It’s My Birthday, you are acquiring more than just a festive graphic; you are obtaining a foundational asset for physical production. This specific collection includes 1 SVG file, 1 DXF file, 1 EPS file, and PNG archives, providing the necessary formats for everything from Cricut and Silhouette cutting machines to professional sublimation printing. However, possessing the correct files is only the first step. The difference between a wasted blank and a polished, sellable product often lies in how you prepare, test, and apply these digital assets.
Many creators, from hobbyists to small business owners, assume that downloading a high-quality vector file guarantees a perfect result. Unfortunately, this assumption leads to frustration when nodes do not cut cleanly, colors appear dull on fabric, or sizing looks disproportionate on the final product. To get the most out of your It’s My Birthday design suite, it is essential to move beyond basic usage and understand the technical nuances of each format and application method.
Selecting the Right Format for Your Machine
A common oversight is using the wrong file type for your specific hardware or software ecosystem. While the description notes that SVG or DXF works for most cutting machines, understanding the distinction prevents workflow bottlenecks. The SVG (Scalable Vector Graphics) file is generally the superior choice for modern die-cutting machines like the Cricut Maker or Silhouette Cameo 4. It retains layer information, allowing you to manipulate individual elements within Design Space or Silhouette Studio without losing quality.
Conversely, the DXF (Drawing Exchange Format) is included primarily for compatibility with older software versions or free editions of Silhouette Studio that cannot import SVGs. A frequent mistake is defaulting to DXF even when SVG support exists. DXF files often lose color data and layer grouping during conversion, forcing you to manually reassign cut lines and colors. Always check your software capabilities first; reserve the DXF solely for legacy systems to save significant setup time.
For those venturing into commercial merchandise, the EPS (Encapsulated PostScript) and PNG archives serve different masters. Do not attempt to cut an EPS file on a standard hobbyist cutter; it is designed for Adobe Illustrator, CorelDRAW, and professional print shops. Similarly, while the PNG is excellent for sublimation or iron-on transfers due to its transparent background and rasterized detail, it lacks the vector paths required for clean vinyl cuts. Using a PNG for vinyl weeding will result in jagged edges and excessive material waste.
Avoiding Sizing and Proportion Errors
Digital designs can be deceptive on screen. A design labeled It’s My Birthday might look perfectly balanced at 8 inches wide in your design software, but proportions change drastically depending on the substrate. One of the most costly mistakes in apparel creation is failing to account for garment size and placement relative to the wearer's body.
Before committing expensive blanks to the blade or heat press, utilize the "real-world" measurement technique. Print the design on standard paper at actual size and tape it to the intended shirt, mug, or poster board. Step back and view it from a conversational distance. You may find that a design perfect for an adult XL hoodie overwhelms a youth medium or sits too low on a fitted tee. This thirty-second verification step prevents the heartbreak of ruining inventory and ensures the typography remains legible and aesthetically pleasing across different sizes.
Material-Specific Adjustments
Treating all materials identically is a recipe for poor adhesion and premature peeling. The It’s My Birthday design likely contains intricate details that behave differently on cardstock versus polyester. When working with iron-on or heat transfer vinyl (HTV), intricate script or thin lines require adjusted pressure and temperature settings compared to bold block letters.
- Mirror Your Image: For any iron-on or sublimation project using this design, always toggle the mirror setting before cutting or printing. Forgetting this renders text backwards and unusable.
- Weeding Complexity: If the birthday design features delicate cursive, consider simplifying the nodes in your software before cutting. Overly complex vectors can cause the vinyl to lift during weeding. A slight weld or simplify function can make production smoother without altering the visual appearance.
- Sublimation Bleed: When using the PNG archive for sublimation shirts, remember that ink spreads slightly under heat. Avoid placing critical text elements within 0.25 inches of the seam or collar to prevent distortion during the pressing process.
Optimizing Sublimation and Iron-On Transfers
The inclusion of PNG archives makes this package ideal for sublimation, yet color management remains a significant hurdle. Screens emit light (RGB), while printers use ink (CMYK). A vibrant neon pink on your monitor may print as a muted magenta. Before running a full batch of birthday shirts, perform a test print on sublimation paper and press it onto a scrap piece of the exact same fabric you intend to use.
This test serves two purposes: verifying color accuracy and checking image resolution. Ensure the PNG provided in the It’s My Birthday download is at least 300 DPI at your desired print size. Stretching a low-resolution PNG results in pixelation that becomes glaringly obvious after heat pressing. If the file appears soft on screen at 100% zoom, it will look blurry on fabric. In such cases, utilize the EPS or SVG vector files to generate a fresh, high-resolution export at the exact dimensions needed rather than upscaling a raster image.
Expanding Beyond Apparel: Cards and Wall Art
Your imagination is indeed the limit, but practical constraints still apply to non-apparel projects. When adapting the It’s My Birthday SVG for greeting cards or wall posters, consider the hierarchy of information. A design optimized for a t-shirt chest area often has horizontal spacing that looks awkward on a vertical 5x7 card.
Rather than stretching the design vertically, which distorts letterforms, unlock the aspect ratio in your design software to adjust spacing independently. Alternatively, separate the design elements. Use the main typographic element for the card front and repurpose smaller icons or flourishes from the set for the envelope liner or interior message. This modular approach maximizes the value of your single download while creating a cohesive, professional stationery suite.
For wall art, file format integrity is paramount. Never use a screenshot or a web-optimized JPEG for large-format printing. Stick to the SVG or EPS files to ensure crisp lines regardless of whether you are printing a 4x6 photo or a 24x36 canvas. If sending the file to a professional print shop, confirm their preferred format beforehand; some prefer outlined EPS files to avoid font substitution issues, while others request high-res PDFs exported directly from the vector source.
Final Pre-Production Checklist
To ensure efficiency and satisfaction with your It’s My Birthday assets, adopt a systematic pre-flight check. Verify that your cutting mat is sticky enough to hold cardstock but not so aggressive that it tears delicate vinyl. Confirm that your blade depth is calibrated for the specific material thickness. Most importantly, respect the licensing terms associated with your download. Understanding whether you have personal-use-only rights or commercial permissions protects your business from legal issues and supports the original designer.
By approaching this digital download with technical intention rather than casual assumption, you transform a simple file package into a reliable production asset. Whether you are stamping shirts, crafting personalized cards, or designing wall decor, the quality of your output depends entirely on the care taken during preparation. Test thoroughly, choose formats wisely, and let your creativity flourish within the bounds of best practices.